A guide to making video content accessible
When publishing video content to keele.ac.uk, we are required by law to make it accessible to all users. Accessible videos allow all users, including those with a disability (such as visual or hearing disabilities), or non-native English speakers, to interact with video content. Accessible videos must include both video captions and transcripts.
Who is responsible for making video content accessible?
The video creator and/or Web Champion who is uploading the content is responsible for making sure video content meets accessibility requirements before publishing on the University’s website.
How to make a video accessible
If you already have a transcript:
If you already have a text transcript of your video, you will need to add it to the video transcripts area of the website (within the CMS, see root » keele » Home » k-microsites: accessibility a11y » Video transcripts – you could duplicate an existing page and update it with your new transcript), and then link to it from wherever you have placed the video on the website, via either the video embed template, or inline using a normal link.
Example video with transcript linked underneath
If you don’t already have a transcript:
If you don't already have a transcript, you can let YouTube assist you using speech recognition.
To have YouTube create a transcript for you, upload your video and then check back occasionally until you see that your video has been processed.
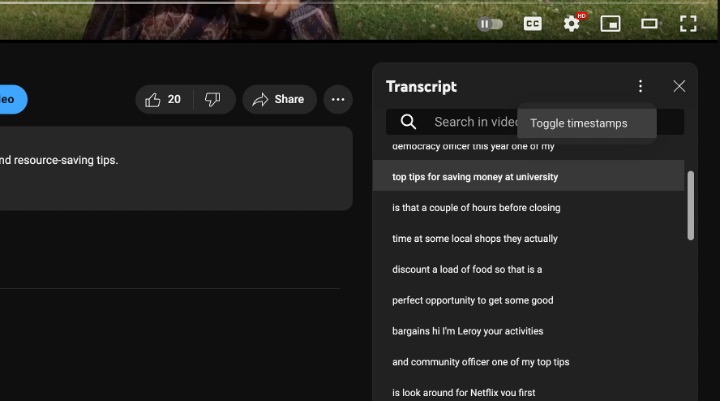
To download the YouTube transcript:
- Go to the video on YouTube
- Expand the video description
- Click the transcript button - the transcript box will open alongside the video...
- Select the correct language in the subtitle's menu, and toggle timestamps on or off for the YouTube transcript
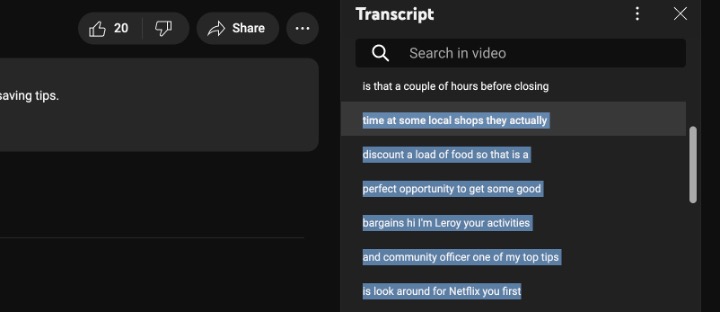
- Click and drag to highlight the whole transcript
- Copy the text (Ctrl +C on Windows, Command + C on Mac)
- Open a text editor and paste the text and save the file
Unless you are adding an Audio Description, we recommend having timestamps switched off.
You may then need to tidy up the text, as it may include errors.
See more details on using automatic YouTube captioning.
Adding subtitles to your YouTube video
Once you have downloaded your transcript and tidied it up / fixed any errors, you can re-add it to YouTube so users can turn it on as closed captions.
Login to YouTube, edit the video, and click on ‘Subtitles’ on the left.
Next to ‘English (Automatic)’, click on ‘Duplicate and Edit’.
Click ‘Edit as Text’, then paste in your new transcript. YouTube should automatically arrange the text to be at the right time stamps, but if it isn’t, click ‘Edit Timings’ and change the timings.
See additional advice on adding your transcript to YouTube videos.